Version Control
Revision as of 21:29, 14 November 2016 by imported>HaploTR
Information contained herein was taken from the Skyrim page, and amended after testing in the Fallout 4 Creation Kit. Though instructions are similar, this page shall document the process specifically for Fallout 4, in the context of mod collaboration from multiple contributors. This page will not document how to use external revision control software such as Perforce, or Git.
Setup your Creation Kit installation to enable version control
- Navigate to your Fallout 4 directory
- Create the following new folders:
- Fallout 4\Merging\Data
- Fallout 4\Merging\VersionBackup
- Fallout 4\Data\CheckInBackup
- Enable Windows Sharing for the newly created folders
- Right click on the CheckInBackup folder -> select "Properties" -> select the "Sharing" tab -> click "Advanced Sharing..."
- Click "Share this folder", and then "OK"
- Back on the Properties windows, click "Share..."
- You won't actually be sharing your computer with anyone else, so you don't have to add any additional users - just click "Share" -> "Done"
- Make note of the "Network Path" displayed, you'll need this for the next step
- Repeat the above for the Merging folder (you don't need to do this individually for the two sub-folders within)

- Next, navigate back to your Fallout 4 directory
- Open the file "CreationKit.ini"
- Modify the following line to say:
bUseVersionControl=1
- Add the following lines (anywhere under the "[General]" heading):
SNetwork Path=\\COMP-NAME\Merging\
SNewVersionBackupPath=\\COMP-NAME\Merging\VersionBackup\
SNetworkMasterPath=\\COMP-NAME\Merging\Data\
SLocalBackupPath=Data\CheckInBackup\
- Note:
- - There is a space in "SNetwork Path"
- - Replace "COMP-NAME" with your computer name, displayed on the window in the above screenshot
- - Do not omit the "\" at the end of the paths above, or this will not work properly


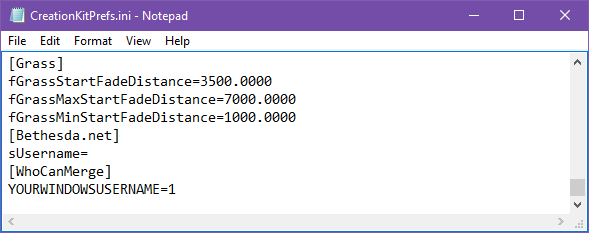
- Finally, open "CreationKitPrefs.ini"
- Scroll to the bottom of the file, and add the following lines
[WhoCanMerge]
YOURWINDOWSUSERNAME=1
- Note:
- - Replace "YOURWINDOWSUSERNAME" with your actual windows username

Understanding .esp and .esm files
.esp files are "Bethesda Plugin Data Files"
- This is the standard file type created by the Creation Kit, to save your mod
- It contains all of the asset reference data used in your mod
.esm files are "Bethesda Master Data Files"
- This is the file type you'll see used by DLC
- It contains the same information used by .esp files, but it can have references merged into it
In the context of using version control in the Fallout 4 Creation Kit:
- The .esm master file will be your primary mod file, containing all the level and asset reference data for your mod. When you're ready to distribute your mod, it's the .esm that you'll upload.
- The .esp file will be the file you and your project contributors use locally to make all your changes. After you merge your changes into the .esm file, the .esp won't contain any references
- The first time you save your mod, it will be saved as .esp (you do not have a choice)
- It will become .esm the first time you do a merge to prepare it for multi-contributor collaboration
First merge and creation of your .esm file
Once you've saved your mod as a .esp (regardless of the content), you must do a first merge to create your initial .esm file:
- Navigate to your "Fallout 4\Data" directory
- Copy "Fallout4.esm" to "Fallout 4\Merging\Data"
- If you don't copy this file, the merge process will error out
- Next, open your .esp as the Active File
- After the file has finished loading in the Creation Kit, click "File" -> "Data..." (or the open folder icon)
- Select "Fallout4.esm" in the list, and click "Details..."
- When asked "Do you want to use an empty list to save memory?", click "Yes"
- You'll now be shown a new popup titled "File Details", but it will have no contents.
- On your keyboard, press Shift+Ctrl+B
- You'll be asked if you want to update the Bit Array Files, and warned it can take several minutes. Of course, click "Yes".
- When it's finished, you'll see "Updating bit arrays...Done" in the bottom status bar of the main window


Now you're ready to create your .esm file!
- Ensure the .esp mod file has been opened as the Active File (this should have been done earlier, but do it again if you restarted the Creation Kit)
- You'll notice that you have a new little Version Control icon from when we enabled it in the Creation Kit. Click it.
- For this tutorial, I created "MyMod.esp", and I duplicated the "aaaMarkers" Cell from the base game Fallout4.esm
- In the bottom left, the "Altered" View will show all of the changes detected between the Fallout4.esm file, and MyMod.esp
- Select all the files in the list, and click "Check Out". This will deselect them.
- Select all the files in the list, and click "Check In". This will open a comment box. You can ignore this for the first time .esm creation, and just click "OK".
- Next it will open a save dialogue, defaulting to \\COMP-NAME\Merging\Data
- Save your plugin using any name (presumably the same name as your .esp, but notice the file extension is .esm in the save dialogue)
- Do NOT attempt to overwrite Fallout4.esm
- When asked "Do you wish to select a Check In Data file to use for assign forms new IDs on check in?", select "No"
- The results are output into the normal Data folder
- You can see that after a merge is performed, the filesize of the .esp is now 1KB, because the contents have been transferred to the newly created .esm


