Difference between revisions of "Category:Editor Interface"
imported>Qazaaq |
(Filled in a few blanks. Visibility done and Linked to Precombined References Page. Gameplay is nearly done.) |
||
| (11 intermediate revisions by 2 users not shown) | |||
| Line 1: | Line 1: | ||
{{Incomplete Article}} | |||
The [[Creation Kit]] is the primary tool for creating and editing [[Data File]]s. | The [[Creation Kit]] is the primary tool for creating and editing [[Data File]]s. | ||
Here you can find information about all the windows and dialogs you may encounter while using the toolset. | Here you can find information about all the windows and dialogs you may encounter while using the toolset. | ||
| Line 5: | Line 6: | ||
[[File:CreationKit Editor.png|600px]] | [[File:CreationKit Editor.png|600px]] | ||
= | = Toolbar = | ||
The main toolbar includes a set of buttons as shortcuts for commonly used functions from the menus. | |||
[[File:Editor Toolbar.png]] | |||
*[[File:Version Control Icon.png]] '''Version Control:''' Opens the [[Version Control Window]]. | |||
*[[File:Data File Load Icon.png]] '''Load Master/Plugin Files:''' Opens the [[Data Window]]. | |||
*[[File:Data File Save Icon.png]] '''Save Plugin:''' Saves any changes you've made to the current ''Active'' file. | |||
*[[File:Data File Save - Hotload PC Icon.png]] [[File:Data File Save - Hotload Xbox Icon.png]] [[File:Data File Save - Hotload Playstation Icon.png]] '''Save Plugin, then hot-load it into game on (PC, Xbox, Playstation):''' | |||
*[[File:Go To Selection - PC.png]] [[File:Go To Selection - Xbox.png]] '''Go to Selection on (PC, Xbox):''' | |||
*[[File:Preferences Icon.png]] '''Preferences:''' Updates CreationKitPrefs.ini with user preferences. | |||
*[[File:Material Editor Icon.png]] '''Open Material Editor:''' ''Website this links to is currently defunct. All JQuery files for it are located within Tools folder.'' Material files can be built with 3DS Max Slate Material Editor or with Community-Created Third Party Tools. | |||
*[[File:Edit Undo Icon.png]] '''Undo:''' Used to undo last command. There are certain commands that cannot be undone. | |||
*[[File:Edit Redo Icon.png]] '''Redo:''' Used to redo last command undone. There are certain commands that cannot be redone. | |||
*[[File:Snap To Grid Icon.png]] '''Snap to Grid:''' Grids determined by Preferences. Default is 64 units. Settings with values of 2 and 4 seem to work best for precision placement for beginners. You will need to find your favorite way of moving things around in the Render Window. | |||
*[[File:Snap To Angle Icon.png]] '''Snap to Angle:''' Angles determined by Preferences. | |||
*[[File:Snap To Connect Points Icon.png]] '''Snap to Connect Points:''' Snaps to Workshop Connect Points on model. | |||
*[[File:Toggle Local Global Translation Icon.png]] '''Toggle Local/Global Translation:''' Toggles Local/Global Translation of Gizmos in the Render Window. (Especially helpful in the Commonwealth where the local axis is off-center.) | |||
*[[File:World Heightmap Editing Icon.png]] '''World (Heightmap) Editing:''' | |||
*[[File:Landscape Editing Icon.png]] '''Landscape Editing:''' | |||
*[[File:Run Havok Sim Icon.png]] '''Run Havok Sim:''' Toggle to examine ragdoll behavior of clutter or dead bodies. | |||
*[[File:Animate Lights and Effects Icon.png]] '''Animate Lights and Effects:''' Toggle to examine effects in Render Window. | |||
*[[File:Toggle Lights Icon.png]] '''Toggle Lights:''' Toggles placed lights on or off. | |||
*[[File:Toggle Sky Icon.png]] '''Toggle Sky:''' Toggles sky cell visibility. | |||
*[[File:Toggle Grass Icon.png]] '''Toggle Grass:''' Toggles visibility of grass. | |||
*[[File:Force Render Window Weather Icon.png]] '''Force render window weather:''' | |||
*[[File:Open Filtered Dialogue Window Icon.png]] '''Open Filtered Dialogue Window:''' | |||
*[[File:NavMesh Mode Icon.png]] '''NavMesh Mode:''' | |||
*[[File:Set Up Default Lights Icon.png]] '''Set Up Default Lights:''' Sets up 4 defaultLight objects around the area which can be deleted if necessary. | |||
*[[File:Create Trigger Icon.png]] '''Create Trigger:''' Creates Trigger volume | |||
*[[File:Create a Multibound Cube Icon.png]] '''Create a Multibound Cube:''' | |||
*[[File:Create a Multibound Sphere Icon.png]] '''Create a Multibound Sphere:''' | |||
*[[File:Create an Occlusion Plane Icon.png]] '''Create an Occlusion Plane:''' | |||
*[[File:Create an Occlusion Cube.png]] '''Create an Occlusion Cube:''' | |||
*[[File:Join-Break Occlusion Planes Icon.png]] '''Join/Break Occlusion Planes:''' | |||
*[[File:Create a Roombound Icon.png]] '''Create a Roombound:''' | |||
*[[File:Enter Portal Mode Icon.png]] '''Enter Portal Mode:''' | |||
*[[File:Create a Portal Icon.png]] '''Create a Portal:''' | |||
*[[File:Link Portal to Room Icon.png]] '''Link Portal to Room:''' | |||
*[[File:Detach Portal from Room Icon.png]] '''Detach Portal from Room:''' | |||
*[[File:Join Rooms Icon.png]] '''Join Rooms:''' | |||
*[[File:Create a Sound Emitter Icon.png]] '''Create a Sound Emitter:''' | |||
*[[File:Create an Acoustic Space Icon.png]] '''Create an Acoustic Space:''' | |||
*[[File:Create a Box Light Icon.png]] '''Create a Box Light:''' Creates a Light Box for single placed light object to keep light from passing through walls. | |||
*[[File:Create a Collision Plane Icon.png]] '''Create a Collision Plane:''' | |||
*[[File:Create a Collision Cube Icon.png]] '''Create a Collision Cube:''' | |||
*[[File:Create a Collision Sphere Icon.png]] '''Create a Collision Sphere:''' | |||
*[[File:Create a Current Plane Icon.png]] '''Create a Current Plane:''' | |||
*[[File:Create a Current Cube Icon.png]] '''Create a Current Cube:''' | |||
*[[File:Create a Current Sphere Icon.png]] '''Create a Current Sphere:''' | |||
*[[File:Create an LOD Clip Volume Icon.png]] '''Create an LOD Clip Volume:''' | |||
*'''Time of day:''' Will adjust the time of day within the [[Render Window]]. | |||
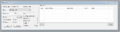
= Statusbar = | |||
The status bar is located at the bottom of the editor window. | |||
The various application status and progress reporting are displayed here. | |||
= Menu Bar = | |||
The menu bar is located at the top of the [[Creation Kit]] window. | |||
Navigating the drop-down menus will reveal many commands, preferences, and settings. | |||
== File == | == File == | ||
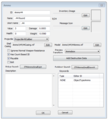
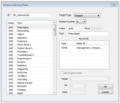
This menu | This menu is used for managing [[Data File]]s, checking data validity and managing [[Archive File]]s. | ||
The editor [[Preferences]] window and import/export data menus data are also here. | |||
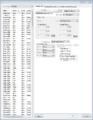
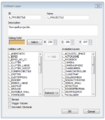
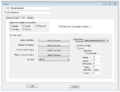
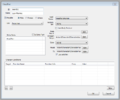
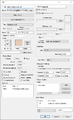
[[File:Data Window.png|400px|right]] | |||
*'''Data...:''' Opens the [[Data Window]]. | *'''Data...:''' Opens the [[Data Window]]. | ||
*'''Save:''' Saves any changes you've made to the current ''Active'' file. If you haven't specified an ''Active'' file in the [[Data Window]], you will be prompted for a new filename to save your changes to. All changes will be saved to a plugin file (FILENAME.esp) based on the current master file. | *'''Save:''' Saves any changes you've made to the current ''Active'' file. If you haven't specified an ''Active'' file in the [[Data Window]], you will be prompted for a new filename to save your changes to. All changes will be saved to a plugin file (FILENAME.esp) based on the current master file. | ||
**Note: Plugin files cannot contain any reserved characters, such as "(" or ")", or when attempting to select them the loader will not recognize them as valid plugins. To remove this error, simply rename the plugin to not contain reserved characters. | **Note: Plugin files cannot contain any reserved characters, such as "(" or ")", or when attempting to select them the loader will not recognize them as valid plugins. To remove this error, simply rename the plugin to not contain reserved characters. | ||
*'''Save and Push Plugin to PC:''' | *'''Save and Push Plugin to PC:''' | ||
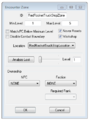
*'''Version Control...:''' Opens the [[Version Control]] | *'''Version Control...:''' Opens the [[Version Control Window]]. | ||
*'''Import/Export:''' Allows you to export data into tab delimited text files. Used for localization during development. | *'''Import/Export:''' Allows you to export data into tab delimited text files. Used for localization during development. | ||
*'''Preferences:''' Allows you to set [[Preference]]s for various aspects of the editor. These preferences mainly having to do with the [[Render Window]]. | *'''Preferences:''' Allows you to set [[Preference]]s for various aspects of the editor. These preferences mainly having to do with the [[Render Window]]. | ||
| Line 31: | Line 87: | ||
*'''Logout:''' Logs the editor out of any logged in Bethesda.net accounts. | *'''Logout:''' Logs the editor out of any logged in Bethesda.net accounts. | ||
*'''Exit:''' Closes the editor. If you have made any changes since your last save, you will be prompted to save before exiting. | *'''Exit:''' Closes the editor. If you have made any changes since your last save, you will be prompted to save before exiting. | ||
{{ClearFloats}} | |||
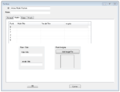
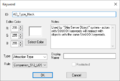
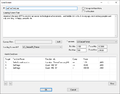
== Edit == | == Edit == | ||
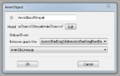
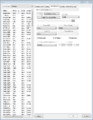
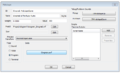
Undo/Redo, Copy/Paste and other essential functions live here, which we will mostly access via [[Creation Kit Interface Cheat Sheet]]. | Undo/Redo, Copy/Paste and other essential functions live here, which we will mostly access via [[Creation Kit Interface Cheat Sheet]]. | ||
[[File:Search & Replace Wildcard Window.png|350px|right]] | |||
*'''{{Anchor|Undo}} <span id="Undo">Undo</span>:''' Negates the last action taken in the [[Render Window]]. For example, an object that had just been moved will be returned to its prior location. | *'''{{Anchor|Undo}} <span id="Undo">Undo</span>:''' Negates the last action taken in the [[Render Window]]. For example, an object that had just been moved will be returned to its prior location. | ||
*'''Redo:''' Re-applies an action undone with the ''Undo'' action. | *'''Redo:''' Re-applies an action undone with the ''Undo'' action. | ||
| Line 45: | Line 103: | ||
*'''Render Window Hotkeys:''' Opens the [[Render Window Hotkeys]] dialog. Shows a listing of all [[Render Window]] commands and their associated hotkeys. | *'''Render Window Hotkeys:''' Opens the [[Render Window Hotkeys]] dialog. Shows a listing of all [[Render Window]] commands and their associated hotkeys. | ||
*'''Render Window Picking Preferences:''' Allows the user to select what types of objects can be picked in the [[Render Window]]. | *'''Render Window Picking Preferences:''' Allows the user to select what types of objects can be picked in the [[Render Window]]. | ||
{{ClearFloats}} | |||
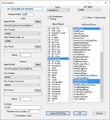
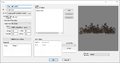
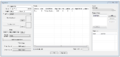
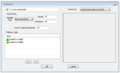
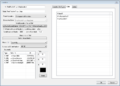
== View == | == View == | ||
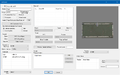
Options here largely control how the Render Window behaves, and will be useful during more complex tasks. | Options here largely control how the [[Render Window]] behaves, and will be useful during more complex tasks. | ||
[[File:Editor RenderWindow.png|400px|right]] | |||
*'''Toolbar:''' Toggles the [[#Toolbar|Toolbar]] at the top of the screen. | *'''Toolbar:''' Toggles the [[#Toolbar|Toolbar]] at the top of the screen. | ||
*'''Statusbar:''' Toggles the [[#Statusbar|Statusbar]] at the bottom of the screen. | *'''Statusbar:''' Toggles the [[#Statusbar|Statusbar]] at the bottom of the screen. | ||
| Line 57: | Line 117: | ||
*'''Show/Hide Window:''' Displays a set of checkboxes to toggle elements in the [[Render Window]]. | *'''Show/Hide Window:''' Displays a set of checkboxes to toggle elements in the [[Render Window]]. | ||
*'''Reference Batch Action Window:''' Enables data changes to a collection of [[Reference]]s. | *'''Reference Batch Action Window:''' Enables data changes to a collection of [[Reference]]s. | ||
*'''Layers...:''' | *'''Layers...:''' Displays a window to show the individual [[Layers]] of the Render Window to keep workspace neat and to avoid accidental breakage of precomputed Visibility while working in the Render Window. | ||
*'''Material Palette:''' | *'''Material Palette:''' | ||
*'''Object Window Layouts:''' | *'''Object Window Layouts:''' User-customized colors for organizing workflow | ||
*'''Current Cell Only:''' Displays only the navmesh of the [[Cell]] in focus. Only functions when editing [[Navmesh]]. | *'''Current Cell Only:''' Displays only the navmesh of the [[Cell]] in focus. Only functions when editing [[Navmesh]]. | ||
*'''Markers:''' Toggles markers in the [[Render Window]]. | *'''Markers:''' Toggles markers in the [[Render Window]]. | ||
| Line 80: | Line 140: | ||
*'''Warnings:''' Opens the [[Warnings]] window. | *'''Warnings:''' Opens the [[Warnings]] window. | ||
*'''Properties:''' Opens the [[Properties]] window. | *'''Properties:''' Opens the [[Properties]] window. | ||
{{ClearFloats}} | |||
== World == | == World == | ||
| Line 133: | Line 194: | ||
This menu holds our various tools for creating and manipulating this valuable functionality. | This menu holds our various tools for creating and manipulating this valuable functionality. | ||
*'''Generation:''' | *'''Generation:''' | ||
**'''Havok-Based Generation:''' | **'''Havok-Based Generation:''' Opens window to auto-generate navmesh based on Havok collision data. | ||
**'''Recast-Based Generation:''' | **'''Recast-Based Generation:''' | ||
**'''Advanced:''' | **'''Advanced:''' | ||
| Line 139: | Line 200: | ||
*'''Check NavMeshes:''' | *'''Check NavMeshes:''' | ||
*'''Finalize Cell NavMeshes:''' | *'''Finalize Cell NavMeshes:''' | ||
*'''Find Cover Edges:''' | *'''Find Cover Edges:''' Finds suitable cover edges for AI seeking cover during combat. | ||
*'''Precut All Scrappables:''' | *'''Precut All Scrappables:''' Adds navcuts around all scrappable objects in cell so that AI can continue to navigate after objects are scrapped. | ||
*'''Link All Scrappables:''' | *'''Link All Scrappables:''' | ||
*'''Create Precuts for Selection:''' | *'''Create Precuts for Selection:''' | ||
| Line 185: | Line 246: | ||
== Visibility == | == Visibility == | ||
*'''Generate Visibility for Current Cell:''' | These settings are for generating [[Precombined References]]. | ||
*'''Generate Visibility for All Loaded Cells:''' | |||
*'''Generate Precombined Visibility for Current Cell:''' | *'''Generate Visibility for Current Cell:''' Precomputes the Visibility for cell currently loaded in Render Window. | ||
*'''Generate Precombined Visibility for All Loaded Cells:''' | *'''Generate Visibility for All Loaded Cells:''' Precomputes the Visibility for all cells currently loaded in Render Window. Amount of cells determined by '''Preferences''' UGridsToLoad. | ||
*'''Generate Precombined Visibility for Current Cell:''' Precomputes Visibility and Precombines geometry based on that Visibility computation for cell currently loaded in Render Window. | |||
*'''Generate Precombined Visibility for All Loaded Cells:''' Precomputes Visibility and Precombines geometry based on that Visibility computation for all cells currently loaded in Render Window. Amount of cells determined by '''Preferences''' UGridsToLoad. | |||
== Character == | == Character == | ||
| Line 199: | Line 262: | ||
*'''Quest Voice Asset Totals:''' | *'''Quest Voice Asset Totals:''' | ||
*'''Update NPC Body Tint Colors:''' | *'''Update NPC Body Tint Colors:''' | ||
*'''Update FaceBones Model Availability:''' | *'''Update FaceBones Model Availability:''' Batch updater for Facebone Models to adjust faceware to fit non-default faces. (All models must already be archived in BA2) | ||
*'''Edit Player Dialogue:''' | *'''Edit Player Dialogue:''' | ||
*'''Quest Aliases:''' | *'''Quest Aliases:''' | ||
| Line 206: | Line 269: | ||
== Gameplay == | == Gameplay == | ||
These advanced settings can have game-wide effects. | These advanced settings can have game-wide effects. | ||
*'''Settings:''' | *'''Settings:''' All adjustable Gameplay Settings for the game. | ||
*'''Papyrus Script Manager:''' Opens the [[Papyrus Manager Window]]. | *'''Papyrus Script Manager:''' Opens the [[Papyrus Manager Window]]. | ||
*'''Compile Papyrus Scripts...:''' | *'''Compile Papyrus Scripts...:''' Compiles any script in the Scripts/User/Source folder | ||
*'''Migrate Papyrus Property Data...:''' | *'''Migrate Papyrus Property Data...:''' | ||
*'''Animations:''' | *'''Animations:''' Opens Behavior Graphs window for all animated Actors. | ||
*'''Facial Animation...:''' | *'''Facial Animation...:''' | ||
*'''Animation Sound Tag Overrides...:''' | *'''Animation Sound Tag Overrides...:''' Animation Sound Tag Information as listed on the Havok Behavior file can be overridden on this Window. | ||
*'''Camera Paths:''' | *'''Camera Paths:''' Stack of all available Camera Paths for setting conditional data. (Camera Shots set up via [[CameraShot]] under SpecialEffect in Object Window) | ||
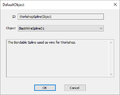
*'''Default Objects...:''' | *'''Default Objects...:''' List of Default Objects. This list is mostly obsolete for Fallout 4. See DefaultObject under Miscellaneous in Object Window. User cannot add new Default Objects. | ||
*'''Validate Forms:''' | *'''Validate Forms:''' Validates all forms in currently loaded plugin. Useful for checking for potential warnings and errors. | ||
== Help == | == Help == | ||
The help menu is used to access this wiki and to confirm the version number of the [[Creation Kit]]. | The help menu is used to access this wiki and to confirm the version number of the [[Creation Kit]]. | ||
Simple version information and a link to this wiki! | Simple version information and a link to this wiki! | ||
*'''Contents:''' | *'''Contents:''' | ||
*'''About:''' Selecting this function will bring up a window listing the [[Creation Kit]]'s current version number. This can be found at the top of the window, just over the logo. | *'''About:''' Selecting this function will bring up a window listing the [[Creation Kit]]'s current version number. This can be found at the top of the window, just over the logo. | ||
[[Category:Editor Reference]] | [[Category:Editor Reference]] | ||
Latest revision as of 07:12, 12 October 2023
| This article has been flagged as incomplete. |
| Please help improve the wiki by learning how to contribute. |
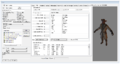
The Creation Kit is the primary tool for creating and editing Data Files. Here you can find information about all the windows and dialogs you may encounter while using the toolset.

Toolbar[edit | edit source]
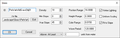
The main toolbar includes a set of buttons as shortcuts for commonly used functions from the menus.
![]()
 Version Control: Opens the Version Control Window.
 Load Master/Plugin Files: Opens the Data Window.
 Save Plugin: Saves any changes you've made to the current Active file.

 Save Plugin, then hot-load it into game on (PC, Xbox, Playstation):
 Go to Selection on (PC, Xbox):
 Preferences: Updates CreationKitPrefs.ini with user preferences.
 Open Material Editor: Website this links to is currently defunct. All JQuery files for it are located within Tools folder. Material files can be built with 3DS Max Slate Material Editor or with Community-Created Third Party Tools.
 Undo: Used to undo last command. There are certain commands that cannot be undone.
 Redo: Used to redo last command undone. There are certain commands that cannot be redone.
 Snap to Grid: Grids determined by Preferences. Default is 64 units. Settings with values of 2 and 4 seem to work best for precision placement for beginners. You will need to find your favorite way of moving things around in the Render Window.
 Snap to Angle: Angles determined by Preferences.
 Snap to Connect Points: Snaps to Workshop Connect Points on model.
 Toggle Local/Global Translation: Toggles Local/Global Translation of Gizmos in the Render Window. (Especially helpful in the Commonwealth where the local axis is off-center.)
 World (Heightmap) Editing:
 Landscape Editing:
 Run Havok Sim: Toggle to examine ragdoll behavior of clutter or dead bodies.
 Animate Lights and Effects: Toggle to examine effects in Render Window.
 Toggle Lights: Toggles placed lights on or off.
 Toggle Sky: Toggles sky cell visibility.
 Toggle Grass: Toggles visibility of grass.
 Force render window weather:
 Open Filtered Dialogue Window:
 NavMesh Mode:
 Set Up Default Lights: Sets up 4 defaultLight objects around the area which can be deleted if necessary.
 Create Trigger: Creates Trigger volume
 Create a Multibound Cube:
 Create a Multibound Sphere:
 Create an Occlusion Plane:
 Create an Occlusion Cube:
 Join/Break Occlusion Planes:
 Create a Roombound:
 Enter Portal Mode:
 Create a Portal:
 Link Portal to Room:
 Detach Portal from Room:
 Join Rooms:
 Create a Sound Emitter:
 Create an Acoustic Space:
 Create a Box Light: Creates a Light Box for single placed light object to keep light from passing through walls.
 Create a Collision Plane:
 Create a Collision Cube:
 Create a Collision Sphere:
 Create a Current Plane:
 Create a Current Cube:
 Create a Current Sphere:
 Create an LOD Clip Volume:
- Time of day: Will adjust the time of day within the Render Window.
Statusbar[edit | edit source]
The status bar is located at the bottom of the editor window. The various application status and progress reporting are displayed here.
Menu Bar[edit | edit source]
The menu bar is located at the top of the Creation Kit window. Navigating the drop-down menus will reveal many commands, preferences, and settings.
File[edit | edit source]
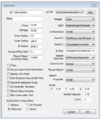
This menu is used for managing Data Files, checking data validity and managing Archive Files. The editor Preferences window and import/export data menus data are also here.

- Data...: Opens the Data Window.
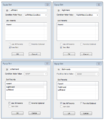
- Save: Saves any changes you've made to the current Active file. If you haven't specified an Active file in the Data Window, you will be prompted for a new filename to save your changes to. All changes will be saved to a plugin file (FILENAME.esp) based on the current master file.
- Note: Plugin files cannot contain any reserved characters, such as "(" or ")", or when attempting to select them the loader will not recognize them as valid plugins. To remove this error, simply rename the plugin to not contain reserved characters.
- Save and Push Plugin to PC:
- Version Control...: Opens the Version Control Window.
- Import/Export: Allows you to export data into tab delimited text files. Used for localization during development.
- Preferences: Allows you to set Preferences for various aspects of the editor. These preferences mainly having to do with the Render Window.
- Validate Loaded Data: Validate Loaded Data runs a check through the loaded plugin and master files to check for errors in how the data is set up. This check is also run automatically when the Creation Kit finishes loading the data selected; this is just a way to run that check without having to reload the data.
- Create Archive: Opens up the Archive Browser window. The Creation Kit includes a rudimentary tool for gathering Game Files and bundling them into an Archive Files.
- Upload Plugin and Archive to Bethesda.net: Uploads the mod to Bethesda.net for the selected platform.
- PC: Selects the PC platform for upload.
- XB1: Selects the Xbox platform for upload.
- PS4: Selects the Playstation platform for upload.
- Compact Active File Form IDs: Compacts all form IDs in the Active file. This will invalidate any saves made off this file.
- Convert Active File to Light Master: Converts the Active file to a light master file. This will only work for small files.
- Login to Bethesda.net...: Opens the Bethesda Login Window.
- Logout: Logs the editor out of any logged in Bethesda.net accounts.
- Exit: Closes the editor. If you have made any changes since your last save, you will be prompted to save before exiting.
Edit[edit | edit source]
Undo/Redo, Copy/Paste and other essential functions live here, which we will mostly access via Creation Kit Interface Cheat Sheet.

- Undo: Negates the last action taken in the Render Window. For example, an object that had just been moved will be returned to its prior location.
- Redo: Re-applies an action undone with the Undo action.
- Cut Render: Removes any selected references from the Render Window.
- Copy Render: Copies any currently selected references in the Render Window. Note that relative position and orientation will be maintained.
- Paste Render: Pastes any previously copied reference, or multiple references, into the Render Window at the cursor's current position. All references copied into the window will be selected.
- Paste in Place: Pastes in any selected reference(s) at the position of the initial location copied from.
- Duplicate: Create a new version of any currently selected references in the same location as the original. The newly created reference is immediately selected.
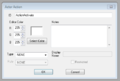
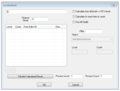
- Search & Replace...: Opens the Search & Replace window.
- Find Text: Opens the Text Search window.
- Render Window Hotkeys: Opens the Render Window Hotkeys dialog. Shows a listing of all Render Window commands and their associated hotkeys.
- Render Window Picking Preferences: Allows the user to select what types of objects can be picked in the Render Window.
View[edit | edit source]
Options here largely control how the Render Window behaves, and will be useful during more complex tasks.

- Toolbar: Toggles the Toolbar at the top of the screen.
- Statusbar: Toggles the Statusbar at the bottom of the screen.
- Object Window: Toggles the Object Window.
- Cell View Window: Toggles the Cell View Window.
- Scene Info Window: Toggles the Scene Info Window.
- Open Windows...: Displays the Open Windows dialog which is a list of all opened windows in the Creation Kit.
- Preview Window: Displays a window to preview objects selected in tree.
- Show/Hide Window: Displays a set of checkboxes to toggle elements in the Render Window.
- Reference Batch Action Window: Enables data changes to a collection of References.
- Layers...: Displays a window to show the individual Layers of the Render Window to keep workspace neat and to avoid accidental breakage of precomputed Visibility while working in the Render Window.
- Material Palette:
- Object Window Layouts: User-customized colors for organizing workflow
- Current Cell Only: Displays only the navmesh of the Cell in focus. Only functions when editing Navmesh.
- Markers: Toggles markers in the Render Window.
- Light Markers: Toggles the markers used for Light sources (typically a light bulb) in the Render Window.
- Sound Markers: Toggles the markers used for Sound sources in the Render Window.
- Light Radius: Toggles display of Light radius in the Render Window.
- Wireframe: Toggles between Wireframe and normal rendered view in the Render Window.
- Bright Light: Toggles Bright Light view in Render Window.
- Sky: Toggles the sky in the Render Window.
- Grass: Toggles grass on and off in the editor.
- Fog: Toggles fog on and off in the editor.
- Collision Geometry: Toggles Collision Geometry display in the Render Window.
- Leaves: Toggles leaves on or off in the Render Window.
- Trees: Toggles trees on or off in the Render Window.
- Occlusion Planes: Toggles display of occlusion surfaces.
- Isometric: Rotates through three perspective views (top, front, and left) of the selected object in the Render Window.
- Top: Moves the camera to a top view of the selected object in the Render Window.
- Depth Biasing: Forces the depth biasing to function as it would in game. This is a great way to see which objects will Z-Fight in the game, even if they aren't in the editor.
- Refresh Render Window: Refreshes the Render window, this will make all hidden objects visible again as well as update anything that has been changed from outside of the editor, like a new .nif.
- Warnings: Opens the Warnings window.
- Properties: Opens the Properties window.
World[edit | edit source]
This menu collects many tools for manipulating aspects of the game world.
- World Spaces...: Opens the WorldSpace window.
- Regions: Opens the Region window.
- Cells: Opens the Cell window.
- World LOD...: Used for generating LOD Model Files for WorldSpaces.
- World Testing And Reports: Brings up the World Testing sub-menu .
- Test Models:
- Test Icons/Textures:
- Test All Cells:
- Test Interior Cells:
- Output Model Size List:
- Update Distant LOD Data:
- Update Model Bounds:
- Update Model Texture Lists:
- Update Object Visibility Data:
- Update Obstacle Cover Data:
- Analyze Archive Data:
- Recalc Land Normals:
- Find equipment with 100% condition rating:
- View all locks:
- View leveled actors by encounter zone:
- Validate water geometry:
- Output MapMarker Data:
- Global Loot Preview:
- View Render Test Failures...:
- View BetaComment Data...:
- Run Havok Sim: Toggles Havok physics, lighting, and vfx simulation in the Render Window.
- Update Lighting and Effects: Toggles Havok lighting and vfx simulation only. Unlike Run Havok Sim, objects and Actors will not settle while this mode is on.
- Landscape Editing: Used to edit the local landscape in the Render Window.
- Object Palette Editing:
- Heightmap Autopaint:
- Heightmap Import:
- Create Local Maps: This allows local maps to be exported from the Creation Kit. It is not used in creating the local maps seen in game which are automatically generated based on level geometry. This also cannot be used to import a map in place of the generated map.
- Validate room/portal alignment:
- Align tangent space ay NIF intersection:
- Generate LOS:
- Generate Max Height Data For Current Cell:
- Generate Max Height Data For World:
- Generate Max Height Data For ALL Worlds:
- Generate HiRes Heightfield For Cells:
- PreCombine Geometry for Current Cell:
- PreCombine Geometry for Loaded Area:
- PreCombine Geometry For World:
- PreCombine Geometry For Interior Cells:
- Export All Landscape:
- Force Weather:
[edit | edit source]
Users familiar with Fallout 3's GECK will remember navmesh, our central tool for AI navigation through an environment. This menu holds our various tools for creating and manipulating this valuable functionality.
- Generation:
- Havok-Based Generation: Opens window to auto-generate navmesh based on Havok collision data.
- Recast-Based Generation:
- Advanced:
- Auto Generate WorldSpace:
- Check NavMeshes:
- Finalize Cell NavMeshes:
- Find Cover Edges: Finds suitable cover edges for AI seeking cover during combat.
- Precut All Scrappables: Adds navcuts around all scrappable objects in cell so that AI can continue to navigate after objects are scrapped.
- Link All Scrappables:
- Create Precuts for Selection:
- Link Precuts for Selection:
- Clear Precuts from Selection:
- Clear All PRecut Links:
- Move Selection To Separate NavMesh:
- Navmesh Draw Mode:
- Draw Cover:
- Draw Tunnels:
- Draw Waypoints:
- Clear Generated Cover:
- Clear Cover:
- Remove Cell NavMeshes:
- Check Worldspace Cells for Finalize:
- Finalize Loaded Area:
- Finalize WorldSpace:
- Force Finalize Full WorldSpace:
- Finalize All Interiors:
- Force Finalize All Spaces:
- Generate Cover For All Spaces:
- Remove All AutoGen Islands:
- Generate Cell Waypoints:
- Set Cell Auto Generated:
- Clear Cell Auto Generated:
- Audit Navmesh Report:
- Normal Pathing Test:
- Cover Test:
- Dodge Test:
- Flee Test:
- Hide Test:
- LOS Test:
- ClosePoint Test:
- Safe Straight Line Test:
- Navmesh Test Mode:
- Draw Path Only:
- Draw Cost:
- Draw Heuristic:
- Draw Fitness:
- Draw PathSmoother Bounds:
- Update Obstacle Manager:
- Select Triangle By Index:
- Export Navmesh as OBJ:
Visibility[edit | edit source]
These settings are for generating Precombined References.
- Generate Visibility for Current Cell: Precomputes the Visibility for cell currently loaded in Render Window.
- Generate Visibility for All Loaded Cells: Precomputes the Visibility for all cells currently loaded in Render Window. Amount of cells determined by Preferences UGridsToLoad.
- Generate Precombined Visibility for Current Cell: Precomputes Visibility and Precombines geometry based on that Visibility computation for cell currently loaded in Render Window.
- Generate Precombined Visibility for All Loaded Cells: Precomputes Visibility and Precombines geometry based on that Visibility computation for all cells currently loaded in Render Window. Amount of cells determined by Preferences UGridsToLoad.
Character[edit | edit source]
These tools are mostly for the manipulation of character behavior.
- Filtered Dialogue...:
- Export Relationship Data:
- Export Dialogue:
- Export Dialogue for Specific Voices:
- List Neutral Emotion Dialogue:
- Quest Voice Asset Totals:
- Update NPC Body Tint Colors:
- Update FaceBones Model Availability: Batch updater for Facebone Models to adjust faceware to fit non-default faces. (All models must already be archived in BA2)
- Edit Player Dialogue:
- Quest Aliases:
- Generate Player Address Lip Files:
Gameplay[edit | edit source]
These advanced settings can have game-wide effects.
- Settings: All adjustable Gameplay Settings for the game.
- Papyrus Script Manager: Opens the Papyrus Manager Window.
- Compile Papyrus Scripts...: Compiles any script in the Scripts/User/Source folder
- Migrate Papyrus Property Data...:
- Animations: Opens Behavior Graphs window for all animated Actors.
- Facial Animation...:
- Animation Sound Tag Overrides...: Animation Sound Tag Information as listed on the Havok Behavior file can be overridden on this Window.
- Camera Paths: Stack of all available Camera Paths for setting conditional data. (Camera Shots set up via CameraShot under SpecialEffect in Object Window)
- Default Objects...: List of Default Objects. This list is mostly obsolete for Fallout 4. See DefaultObject under Miscellaneous in Object Window. User cannot add new Default Objects.
- Validate Forms: Validates all forms in currently loaded plugin. Useful for checking for potential warnings and errors.
Help[edit | edit source]
The help menu is used to access this wiki and to confirm the version number of the Creation Kit. Simple version information and a link to this wiki!
- Contents:
- About: Selecting this function will bring up a window listing the Creation Kit's current version number. This can be found at the top of the window, just over the logo.
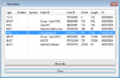
Pages in category "Editor Interface"
The following 15 pages are in this category, out of 15 total.
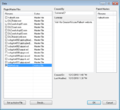
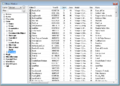
Media in category "Editor Interface"
The following 200 files are in this category, out of 281 total.
(previous page) (next page)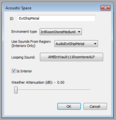 Acoustic Space Editor.png 360 × 373; 12 KB
 Acoustic Space EditorIcon.png 16 × 16; 383 bytes
 Activator Editor.png 1,388 × 617; 52 KB
 Activator EditorIcon.png 16 × 16; 354 bytes
 Actor Action EditorIcon.png 16 × 16; 329 bytes
 Actor Action Object.PNG 467 × 316; 9 KB
 Actor AI Data Editor.png 1,291 × 694; 106 KB
 Actor AI Packages Editor.png 1,291 × 693; 110 KB
 Actor Animation Editor.png 1,291 × 691; 104 KB
 Actor Attack Data Editor.png 1,291 × 691; 111 KB
 Actor Character Gen Morphs Editor.png 1,291 × 692; 118 KB
 Actor Character Gen Parts Editor.png 1,291 × 691; 126 KB
 Actor Editor.png 1,291 × 692; 129 KB
 Actor EditorIcon.png 16 × 16; 352 bytes
 Actor Factions Editor.png 1,291 × 691; 106 KB
 Actor Inventory Editor.png 1,291 × 690; 112 KB
 Actor Keywords Editor.png 1,291 × 690; 106 KB
 Actor Relationships Editor.png 1,292 × 692; 103 KB
 Actor Sounds Editor.png 1,291 × 692; 105 KB
 Actor SpellList Editor.png 1,291 × 692; 106 KB
 Actor Stats Editor.png 1,293 × 694; 116 KB
 Actor Templates Editor.png 1,292 × 692; 112 KB
 Actor Traits Editor.png 1,292 × 691; 113 KB
 Actor Value Editor.png 320 × 632; 16 KB
 AddOnNode EditorIcon.png 16 × 16; 370 bytes
 AimModel Editor.png 715 × 376; 18 KB
 AimModel EditorIcon.png 16 × 16; 306 bytes
 Ammo Editor.png 546 × 608; 28 KB
 Ammo EditorIcon.png 16 × 16; 323 bytes
- Animate Lights and Effects Icon.png 16 × 16; 355 bytes
 AnimObject Editor.png 419 × 264; 13 KB
 AnimObject EditorIcon.png 16 × 16; 334 bytes
 Armor EditorIcon.png 16 × 16; 580 bytes
 ArmorAddon Editor.png 610 × 667; 30 KB
 ArmorAddon EditorIcon.png 16 × 16; 574 bytes
 Art Object Editor.png 660 × 453; 24 KB
 Art Object EditorIcon.png 16 × 16; 294 bytes
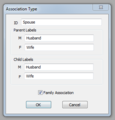 Association Type Editor.png 332 × 347; 13 KB
 Association Type EditorIcon.png 16 × 16; 311 bytes
 AttractionRule Editor.png 474 × 247; 12 KB
 BendableSpline Editor.png 398 × 349; 6 KB
 BendableSpline EditorIcon.png 16 × 16; 296 bytes
 BodyPartData EditorIcon.png 16 × 16; 342 bytes
 Book EditorIcon.png 16 × 16; 352 bytes
 CameraShot EditorIcon.png 16 × 16; 327 bytes
 Cell Editor.png 750 × 968; 52 KB
 Cell Interior Common Data Editor.png 750 × 968; 59 KB
 Cell Interior Data Editor.png 750 × 968; 51 KB
 Cell Interior Directional Ambient Lighting Editor.png 750 × 968; 56 KB
 Cell View Window.png 1,818 × 891; 123 KB
 Class Editor.png 571 × 700; 17 KB
 Class EditorIcon.png 16 × 16; 309 bytes
 Climate Editor.png 705 × 446; 21 KB
 Climate EditorIcon.png 16 × 16; 307 bytes
 Collision Layer Editor.png 465 × 530; 24 KB
 Collision Layer EditorIcon.png 16 × 16; 287 bytes
 ColorForm EditorIcon.png 16 × 16; 299 bytes
 CombatStyle CloseRange Editor.png 645 × 770; 37 KB
 CombatStyle Cover Editor.png 652 × 776; 26 KB
 CombatStyle EditorIcon.png 16 × 16; 330 bytes
 CombatStyle Flight Editor.png 646 × 768; 30 KB
 CombatStyle General Editor.png 646 × 771; 31 KB
 CombatStyle LongRange Editor.png 651 × 775; 30 KB
 CombatStyle Melee Editor.png 649 × 773; 34 KB
 CombatStyle Ranged Editor.png 649 × 776; 26 KB
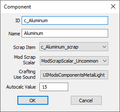 Component Editor.png 283 × 263; 5 KB
 Component EditorIcon.png 16 × 16; 294 bytes
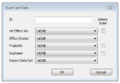
 Condition Editor.png 735 × 205; 4 KB
 Condition Function.png 838 × 378; 108 KB
 Condition Item Editor.png 869 × 142; 10 KB
 Constructible Object Editor.PNG 1,016 × 590; 24 KB
 Constructible Object EditorIcon.png 16 × 16; 311 bytes
 Container Editor.png 1,296 × 811; 211 KB
 Container EditorIcon.png 16 × 16; 464 bytes
- Create a Box Light Icon.png 16 × 16; 342 bytes
- Create a Collision Cube Icon.png 16 × 16; 311 bytes
- Create a Collision Plane Icon.png 16 × 16; 295 bytes
- Create a Collision Sphere Icon.png 16 × 16; 307 bytes
- Create a Current Cube Icon.png 16 × 16; 312 bytes
- Create a Current Plane Icon.png 16 × 16; 298 bytes
- Create a Current Sphere Icon.png 16 × 16; 304 bytes
- Create a Multibound Cube Icon.png 16 × 16; 311 bytes
- Create a Multibound Sphere Icon.png 16 × 16; 311 bytes
- Create a Portal Icon.png 16 × 16; 289 bytes
- Create a Roombound Icon.png 16 × 16; 297 bytes
- Create a Sound Emitter Icon.png 16 × 16; 318 bytes
- Create an Acoustic Space Icon.png 16 × 16; 337 bytes
- Create an LOD Clip Volume Icon.png 16 × 16; 355 bytes
- Create an Occlusion Cube.png 16 × 16; 306 bytes
- Create an Occlusion Plane Icon.png 16 × 16; 294 bytes
- Create Trigger Icon.png 16 × 16; 308 bytes
 Damage Type Editor.png 385 × 269; 4 KB
 Data File Details Info Window GIF.gif 375 × 550; 2.93 MB
 Data File Details Info Window.png 272 × 600; 16 KB
 Data File Details Mark As Ignored Window.png 496 × 229; 10 KB
 Data File Details Window v2.png 529 × 342; 15 KB
- Data File Load Icon.png 16 × 16; 339 bytes
- Data File Save - Hotload PC Icon.png 16 × 16; 376 bytes
- Data File Save - Hotload Playstation Icon.png 16 × 16; 384 bytes
- Data File Save - Hotload Xbox Icon.png 16 × 16; 389 bytes
- Data File Save Icon.png 16 × 16; 315 bytes
 Data Window.png 642 × 586; 24 KB
 Debris EditorIcon.png 16 × 16; 359 bytes
 DefaultObject Editor.png 406 × 321; 5 KB
 DefaultObject EditorIcon.png 16 × 16; 299 bytes
 Destructible Object Data Editor.png 1,048 × 476; 26 KB
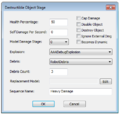 Destructible Object Stage Editor.png 393 × 378; 15 KB
- Detach Portal from Room Icon.png 16 × 16; 338 bytes
 Door Editor.png 1,123 × 498; 35 KB
 Door EditorIcon.png 16 × 16; 341 bytes
 Dual Cast Data Editor.png 399 × 275; 10 KB
 Dual Cast Data EditorIcon.png 16 × 16; 291 bytes
- Edit Redo Icon.png 16 × 16; 298 bytes
- Edit Undo Icon.png 16 × 16; 304 bytes
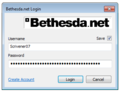 Editor Bethesda Login Window.png 346 × 264; 8 KB
 Editor ObjectWindow.png 810 × 583; 50 KB
 Editor Papyrus Manager Window.png 411 × 719; 36 KB
 Editor RenderWindow.png 1,207 × 573; 1.4 MB
 Editor Toolbar.png 1,417 × 32; 5 KB
 EffectShader EditorIcon.png 16 × 16; 332 bytes
 Enchantment Editor.png 839 × 336; 23 KB
 Enchantment EditorIcon.png 16 × 16; 324 bytes
 Enchantment Effect Item Editor.png 1,123 × 302; 21 KB
 Encounter Zone Analyze Loot Editor.png 444 × 523; 9 KB
 Encounter Zone Editor.png 317 × 427; 11 KB
 Encounter Zone EditorIcon.png 16 × 16; 304 bytes
- Enter Portal Mode Icon.png 16 × 16; 287 bytes
 Equip Slot Editor.png 643 × 741; 27 KB
 Equip Slot EditorIcon.png 16 × 16; 298 bytes
 Explosion Editor.png 459 × 547; 33 KB
 Explosion EditorIcon.png 16 × 16; 346 bytes
 Faction Crime Editor.png 769 × 587; 23 KB
 Faction Editor.png 766 × 585; 35 KB
 Faction EditorIcon.png 16 × 16; 474 bytes
 Faction Rank Editor.png 771 × 588; 15 KB
 Faction Vendor Editor.png 770 × 589; 22 KB
 Flora Editor.png 973 × 507; 53 KB
 Flora EditorIcon.png 16 × 16; 437 bytes
 Footstep EditorIcon.png 16 × 16; 290 bytes
 Footstep Set EditorIcon.png 16 × 16; 310 bytes
- Force Render Window Weather Icon.png 16 × 16; 338 bytes
 FormList Editor.png 310 × 386; 7 KB
 FormList EditorIcon.png 16 × 16; 333 bytes
 Furniture Editor.png 1,495 × 732; 152 KB
 Furniture EditorIcon.png 16 × 16; 325 bytes
 Global Editor.png 229 × 173; 2 KB
 Global EditorIcon.png 16 × 16; 299 bytes
- Go To Selection - PC.png 16 × 16; 394 bytes
- Go To Selection - Xbox.png 16 × 16; 395 bytes
 Grass Editor.png 619 × 198; 6 KB
 Grass EditorIcon.png 16 × 16; 351 bytes
 Hazard Editor.png 460 × 543; 23 KB
 Hazard EditorIcon.png 16 × 16; 282 bytes
 HeadPart Editor.png 759 × 631; 28 KB
 HeadPart EditorIcon.png 16 × 16; 323 bytes
 Holotape Editor.png 695 × 424; 25 KB
 Holotape EditorIcon.png 16 × 16; 454 bytes
 IdleMarker Editor.png 624 × 584; 18 KB
 IdleMarker EditorIcon.png 16 × 16; 337 bytes
 ImageSpace Modifier EditorIcon.png 16 × 16; 299 bytes
 ImpactData EditorIcon.png 16 × 16; 324 bytes
 ImpactDataSet EditorIcon.png 16 × 16; 385 bytes
 Ingredient Editor.png 1,101 × 526; 35 KB
 Ingredient EditorIcon.png 16 × 16; 395 bytes
 Instance Naming Rules Editor.png 587 × 505; 26 KB
- Join Rooms Icon.png 16 × 16; 326 bytes
- Join-Break Occlusion Planes Icon.png 16 × 16; 307 bytes
 Key EditorIcon.png 16 × 16; 314 bytes
 Keyword EditorIcon.png 16 × 16; 302 bytes
 Keyword.png 437 × 295; 7 KB
- Landscape Editing Icon.png 16 × 16; 352 bytes
 LandTexture Editor.png 739 × 452; 12 KB
 LandTexture EditorIcon.png 16 × 16; 329 bytes
 Layer Editor.png 546 × 555; 29 KB
 Layer EditorIcon.png 16 × 16; 300 bytes
 Lens Flare Sprite Editor.png 437 × 424; 17 KB
 LensFlare Editor.png 948 × 617; 38 KB
 LeveledCharacter EditorIcon.png 16 × 16; 334 bytes
 LeveledItem Editor.png 937 × 483; 26 KB
 LeveledItem EditorIcon.png 16 × 16; 335 bytes
 LeveledSpell Editor.png 609 × 464; 14 KB
 LeveledSpell EditorIcon.png 16 × 16; 337 bytes
 Light Editor.png 562 × 911; 25 KB
 Light EditorIcon.png 16 × 16; 343 bytes
 Lighting Template EditorIcon.png 16 × 16; 291 bytes
- Link Portal to Room Icon.png 16 × 16; 322 bytes
 LoadScreen Editor.png 742 × 581; 16 KB
 LoadScreen EditorIcon.png 16 × 16; 347 bytes
 Location Actors Editor.png 897 × 644; 36 KB
 Location Cells Editor.png 897 × 644; 29 KB
 Location Editor.png 897 × 644; 39 KB
 Location EditorIcon.png 16 × 16; 282 bytes
 Location LocRefTypes Editor.png 897 × 644; 37 KB
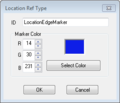 Location Ref Type Editor.png 276 × 236; 6 KB
 Location Ref Type EditorIcon.png 16 × 16; 301 bytes
 Magic Effect Editor.png 1,044 × 853; 71 KB
 Magic Effect EditorIcon.png 16 × 16; 314 bytes
- Material Editor Icon.png 16 × 16; 343 bytes
 Material Object Editor.png 406 × 554; 17 KB
 Material Object EditorIcon.png 16 × 16; 296 bytes


